It happened to nearly everyone you know and always without warning. It could be a piece of gravel kicked up high by the vehicle ahead or an act of malice by an unseen vandal. Either way, debris hitting your windshield is sure to leave a mark and is gong to require an auto glass repair. You can save yourself the hassle of bringing your car to the auto shop if you know how to repair a windshield chip. You can save too, on doing without your car for 2 days and worrying about the cost of the repairs.

It’s always best to repair a small chip in your windshield before it enlarges into an unsalvageable crack that proves to be a road and safety hazard. Learning how to repair a windshield chip can be as simple as essentially filling in the damaged area with acrylic adhesive, epoxy of filler. As long as the chip in the glass isn’t too big, you can give the home remedy a try. There are a number of windshield repair kits that cost substantially less than the bill from the auto parts shop. However, if your windshield constantly gets chipped, perhaps you should consider driving a different route to work.
The windshield has to be completely dry and at approximately room temperature. This is required to prevent water from being trapped in the glass. Dry the glass if needed, ensuring the surface is clean and free of any loose glass pieces. Windshield repair kits generally come as single syringe kits that come with an adhesive strip or bridge-type kits that can be refilled.
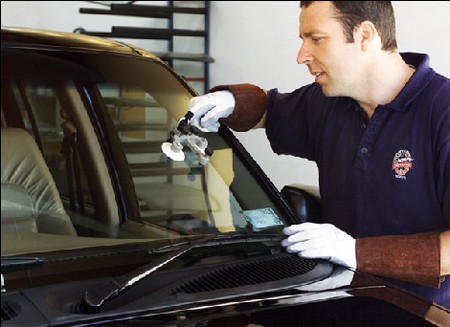
With a syringe kit, the backing film of the adhesive strip is peeled off and the strip applied to the glass and centered over the chip. The strip is burnished to adhere it as well as possible to the glass. Next, the backing film on the other side of the strip is removed and the plastic adapter oriented on the fitting as vertically as possible before it too is attached.
The uncapped syringe is attached to the adapter and draw out the plunger as far as it can go. Hold for up to a minute before releasing the plunger without pressing it. This forces the adhesive into the chip, filling it. The process is repeated 6 to 10 times before the syringe, adapter and adhesive sheet are finally removed. The film of adhesive that remains on the glass surface can be cleaned with a paper towel dampened with alcohol. However, the adhesive directly above the crack should be left untouched to allow it to cure for a few hours. Once the adhesive is dry, it can be leveled and smoothened with a single-edged razor blade.


