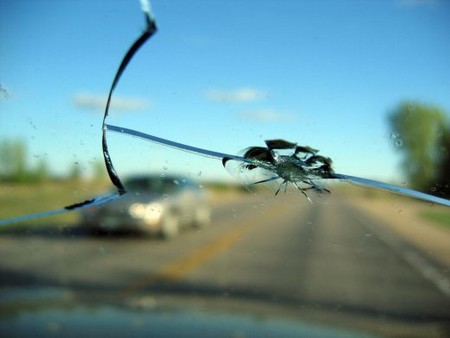
Travelling at speeds of over 100km/hr down the expressway cutting heavy vehicles on the left lane and suddenly you noticed a crack on your windscreen. What happened here is the truck or lorry may have whipped up pebbles from the road and unfortunately it landed right on your windshield. It would be a hassle if you are to go after the transport company for compensation. If would be difficult to justify and even if you won your case, imagine the time lost and stress you have to endure.
Remember that some damages may be worse than others. Some damages can be fixed with DIY techniques and hacks. Other damages would require a windshield replacement. Know the difference between the two.
Another option would be to send the car to the workshop for a windshield repair service. They may require you to leave your car there while they fix the problem. It would be much simpler to follow this tip on how to fix a chipped windshield. When DIY solutions won’t quite make the fix for you, you’ll need a windshield replacement instead.
First of all, you need a kit that contains a syringe apparatus which has a threaded tube and four suction cups spread out like a spider. In addition, grab a bottle of windscreen cleaner and a fresh cleaning rag.
Work on a sunny but parks your car under a shaded area so that you will be able to perform the work comfortably.
Thoroughly clean your windscreen using the cleaner and then dry with rag. Positions the suction cup over the chipped area until the threaded center section is directly on top of it, and then press the suction cup into place.
Use your bare hands to screw the threaded tube into the damaged area. Do not use any tools which may exert excessive force and further damage the windscreen. Recheck the alignment from inside of your car to ensure the threaded tube in directly on top of the chipped windscreen.
Open up the bottle of resin and pour four drips carefully into the end of the threaded tubes. Insert the centre plunger and tighten it all the way down so that the resin penetrates deep into the crack.
Release the plunger and insert a few times to allow air bubbles to escape. Wait for a minute or so for resin to settle in and then release the tool completely from the windscreen. Quickly place a transparent film over the wet resin and spread the resin evenly using a plastic scraper. Allow the resin to dry under hot sun.
After completely dry, remove the thin film and scrape off the excess resin using razor blade until smooth surface is achieved.
Now grab a cold soda and enjoy the result of your hard work.






This is a great automotive how-to article. It’s important to let car owners know that some repairs are within their means to fix, and clear, important information on automotive repairs, even windshield repairs, is always appreciated. Thanks for the great read!