Depending on the extent of the damage, there are several ways to repair a taillight lens. You can seal a crack without removing the lens by using an instant glue such as Zap Gap™, which is available from hobby and craft shops.
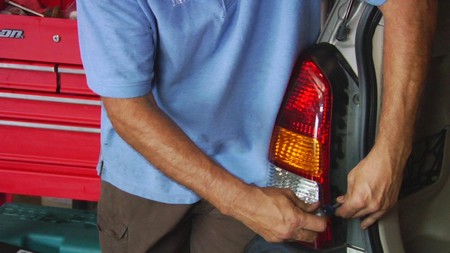
If the lens is shattered, you can use lens repair tape, which is available from auto supply stores. The result isn’t particularly attractive, but the tape will prevent water from getting into the socket, causing corrosion and ruining the light.
The advantage to repairing damage with tape is that you don’t have to remove the lens. However, by removing it you can make a neater repair with Form-a-Lens™, which is available from auto supply stores. This repair compound is a plastic material that closely resembles and blends with the lens. Here is how to use it:
- If the taillight lens contains ridges, use modeling clay to make a mold before removing the lens. Do this by spreading clay over a part of the lens that is intact. Press the clay down to imprint the lens ridges into the clay. Peel off the mold carefully so as not to disrupt the impression.
- Remove the broken lens from the vehicle. If assembly screws aren’t visible on the face of the lens, look in the luggage compartment or on the underside of the bumper. This also is the case if you have to remove a parking lens to replace a burned-out taillight or rear turn-signal bulb or to replace a cracked lens.
- Once the lens has been removed, clean it with a mixture of water and vinegar or with window cleaner. Then, dry it.
- Cover the face of the broken section of lens with the clear plastic film that comes in the repair kit if the lens has no ridges. For a lens with ridges, cover the face of the broken section with the clay mold.
- After mixing the plastic repair compound according to the instructions supplied with the repair kit, turn the lens so that the rear side faces up. Pour the repair material into the hypodermic needle that comes in the kit. Then, inject the material into the broken section through the bulb hole until the section is filled.
- Let the material harden overnight.
- Peel off the clear plastic film or clay mold, wash the lens to remove residue, and put it back on the vehicle.


