Engines equipped with electronic control systems, which are usually referred to erroneously as computerized systems, have oxygen (O2) sensors that monitor the oxygen content of the exhaust. This includes all engines with throttle body and multiport fuel injection systems and some engines with carburetors.

The oxygen sensor allows a microprocessor to adjust the fuel system according to the conditions under which the engine is operating. The fuel system is thus able to adjust itself to deliver a leaner or richer mixture as engine operating conditions require. If the sensor malfunctions, the engine will run on a leaner fuel mixture when it needs a richer mixture or vice versa. Hesitation on acceleration and/or surging will result.
That part of an electronic engine control system involving the oxygen sensor does not begin to function until the engine is warm. Therefore, if hesitation and/or surging occurs immediately after a cold engine is started, the fault does not lie with the sensor. It is only when one or both of these performance problems occur a few minutes after the engine has been running that the sensor becomes suspect.
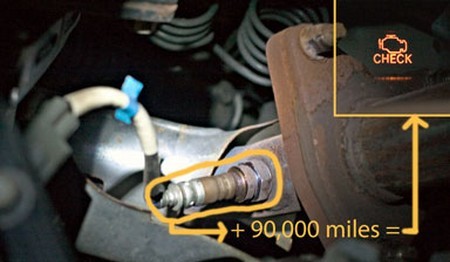
There is another clue to suggest that an oxygen sensor is malfunctioning: The CHECK ENGINE light on the dash glows.
Before consulting a mechanic, you may want to do the tests described here. One of them may straighten out the problem. If it does, you can replace the sensor yourself.
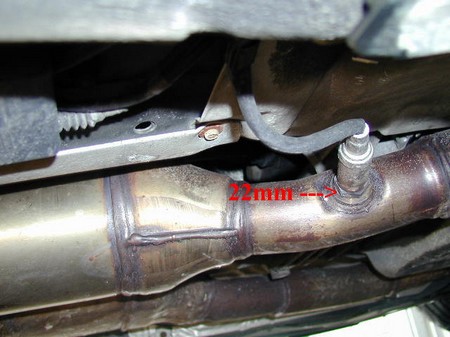
Begin by locating the oxygen sensor. With most engines, it is on the exhaust manifold and is accessible from under the hood. With other engines, the oxygen sensor is tapped into some other part of the exhaust system. Getting at it can only be done from under the car.
With the engine cold, pull the electrical wire connector from the sensor. Wipe the insides of both halves of the connector, and then press the two halves firmly together. Check engine performance. If it is better, the cause of the performance problem was simply a dirty oxygen sensor connection. No further service is necessary.
If cleaning the connector doesn’t help, disconnect the connector again. Use a wrench to remove the sensor from the engine. If the sensor binds in the engine, squirt penetrating oil around the sensor and wait at least 15 minutes. Then, start the engine and let it run for about five minutes before trying to unscrew the sensor with a wrench.
When you finally have the sensor out of the engine, you will probably find oil, grease, or particles clogging the air-intake ports. The sensor may instead be contaminated with carbon, silicon, or lead. In either case, replace the sensor.
Carbon (black, sooty) contamination is caused by an overrich fuel mixture, which indicates a fuel system malfunction. Consult a mechanic, who should troubleshoot the fuel system to find and correct the problem.
Silicone (brownish) contamination is the result of a compound having been used on the engine—usually RTV (room-temperature vulcanizing) gasket material or a spray containing silicone. Avoid this in the future.
Lead (silvery) deposits result from the use of leaded gasoline when the engine requires unleaded gasoline. This must be avoided to prevent serious damage to parts of the emissions-control system.
To install a new oxygen sensor, buy the correct one for your engine by giving the vehicle identification number to an auto parts supplier or to the parts department of a dealer who sells your make of car. Ask parts personnel whether the new sensor possesses a coating of high-temperature antiseize compound on its threads. If not, buy a tube of compound and coat the threads yourself. This should also be done when reinstalling a sensor you removed from the engine for examination.
With the engine cold, thread the new sensor into the engine, being careful to avoid crossing threads. Tighten the sensor, but don’t ram it down. Turn the sensor with a wrench until you encounter resistance. Then, turn it just 1/2 turn more.


