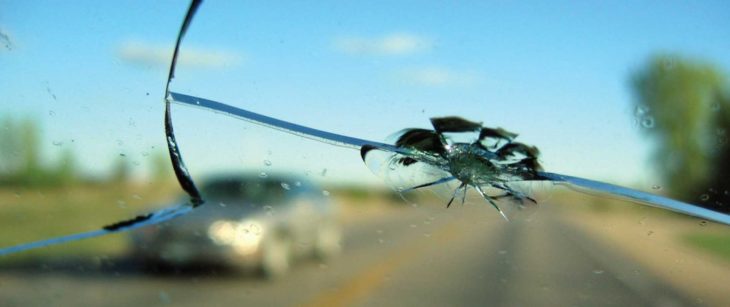
You were driving the kids to school that morning when you heard a sharp Whack in front of you. The sound is enough to quiet the kids in the back seat and one of them even asks quietly, “Did somebody just shoot at us?” After your heart settles back down into your chest, you realize you’ve just been hit with a rock and now you’ve got a glittering divot at eye level in your windshield. This frugal method with help you pinch those pennies and save yourself from having to replace the whole windshield.
First inspect the hole in the windshield
Carefully inspect the damage. If it is not very deep and you don’t feel sharp edges when you run your fingers over it, it probably doesn’t need a professional for a auto glass replacement. If you realize it’s deep into the inner resin of the second layer, then you may want to consider doing your research and hiring a professional. Or if the crack goes all the way through the three layers of glass and you can feel a breeze whistling through when you are at speed, then consider using the Auto Glass Guru to replace the windshield. Otherwise, you will be able to easily repair a small hole and save yourself a significant amount of money.
Before you start
Go to any big box store such as Walmart or Target to purchase a two part adhesive kit with two syringes of adhesive that you’ll need to mix. You can also purchase these types at auto parts stores like O’Reilly’s or Autozone if you’re looking for a bit higher quality. Now you’re ready.
Make sure your windshield is at room temperature and completely dry. If you have access, do these steps inside a climate controlled garage. Or even a covered canopy on a cool day is fine. You can use a hair dryer to get the glass to room temperature or at least close to that.
Next Steps
Peal the backing from the adhesive disc and apply it to the crack, making sure to remove any bubbles around the edges and ensuring all areas are firmly in place. Now place the adhesive adapter over the crack and press down firmly, making sure it covers the crack and is stuck to the adhesive disk. Now we will mix the two compounds in the syringe. This can be accomplished by pouring the adhesive and the hardener into the to syringe.
Now the use the enclosed push pin and insert it into the body of the syringe to allow air to move in and out of the syringe. Attach the syringe to the adapter and you’re now ready to begin. Remove the pin and push the plunger down, removing all the air in the process. Once it’s bottomed out, put the pin back into the hole and slowly pull the plunger back up, creating a small bit of suction. Once the plunger reaches the end, it will click into a clipped slot and stay there. Pull the pin out once more and allow the air to slowly return to the barrel. Once that is done, replace the pin and pull the clip so the syringe plunger moves freely and push the plunger down, forcing the adhesive into the crack. Repeat this process a few times to ensure the crack is completely filled with adhesive. This may take you several times of pin out, pin in, pin out, pin in method until you’ve completely filled the crack, so don’t try to cut corners and make it faster.
One major thing to avoid is trying the push the plunger faster to fill the crack quickly. This will most likely cause the adhesive disk to come unglued and probably squirt glue out the sides and everywhere. The cleanup is a nightmare and defeats the frugality of the project. So just don’t get too excited about finishing quickly. Having said that though, this process only takes about four hours so you will be done and driving in the sunshine in half a day. Not bad for a Frugal DIY windshield fix.
Why it’s important to fix a chipped windshield
The biggest issue most of us who are trying to live frugally have with getting a chip in our windshield is we think, “Oh, it’s small and not worth trying to fix. I don’t have to spend the money right now. I can wait.”
The problem with this mindset is that the chip is a break in the integrity of the windshield as a whole. Today’s car manufacturers have engineered their cars to create a wholly safe vehicle and the structure of the windshield is a key part of that safety. The windshield engineered to keep the frame of the roof stable, so if it’s damaged and you’re in a rollover accident, there is a high likelihood that your roof could collapse and injure or kill those inside.
The front windshield is made specifically to be safer than even the side windows of your car. Side windows of cars are made of tempered glass that, when hit, will shatter into a thousand small pieces that, though sharp, will most likely cause less damage. But tempered glass doesn’t hold up very well with a constant barrage of debris hitting it at high velocity, so it doesn’t last very long as a front windshield. So auto engineered made windshield with three layers. A highly flexible resin is sandwiched between two thin layers of tempered glass. This creates a strong barrier that lasts a lot longer with proper care and fixing when it’s chipped. The key to it’s longevity is to have a rock chip repair in order to maintain that safety and strength.

