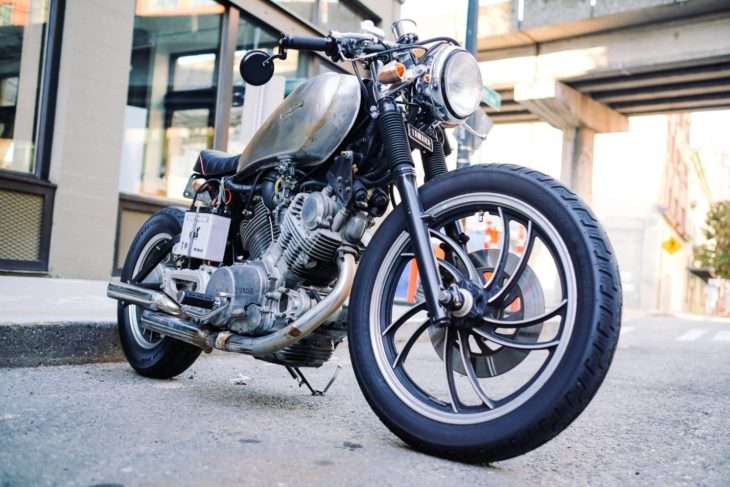
There are certain steps to take when it comes to fixing up an old motorcycle. You can check out our guide here to learn what to do.
Easy Rider is one of the most iconic biker movies of all time. After putting one of the Easy Rider motorcycles up for auction in 2014, it sold for $1.35 million! Making it the most expensive motorcycle in the world.
If you’re born to be wild, you already know how valuable an old motorcycle can be. They’re timeless pieces of history, and they look amazing on the road. However, figuring out how to fix up a vintage motorcycle is anything but easy.
Are you trying to fix up a motorcycle, and it’s your first time? Read on to find out the best steps to take to have a successful restoration.
Preparing to Restore an Old Motorcycle
Before you can begin work to restore an old motorcycle, you’ll first need a service manual. If you already have an owner’s manual, that’s a great start! Your owner’s manual will be a handy tool when it comes time to take care of basic maintenance on your bike.
However, to do more in-depth restorations, you’ll need a service manual to guide the way. The service manual will be able to help you with more complex things. For instance, a service manual will be able to walk you through the steps of rebuilding your bike’s engine.
We suggest you find a printed version of your bike’s service manual. While it may seem like an outdated approach to use printed material, digital screens aren’t the best for dirty greasy hands. When you’re in the middle of restoring your bike, and your hands are greasy, you’ll be happy to have a printed manual to refer to.
Before You Perform Work
After you get the service manual, you’ll probably want to dive right into working. However, before you perform any repairs, you should review the entire service manual and look for lift tables for motorcycles.
Become familiar with the information the service manual covers. If you need to, use tabs to mark what page you think you’ll need to reference the most. After familiarizing yourself with the manual, the next step is to take your bike to a local mechanic.
Stopping by your local community garage, as a mechanic to take a look at your bike. Oftentimes, experienced mechanics will be happy to offer restoration advice to a newbie. Let the mechanic know you’ll be performing the work yourself. Don’t be afraid to take a notebook to jot down notes as the mechanic offers you advice. Finally, go ahead and pay the mechanic some money for their time and advice.
Now, you’re ready to get your hands dirty and start rebuilding!
Restoring Your Bike
The exact build for your bike and what it looks like will vary depending on the condition your bike is in. Your final product will also depend on the plan you put in place when you met with the mechanic. However, no matter what type of build you’re doing, there are a few steps everyone will need to complete. Here’s a shortlist of steps you’ll want to take first:
- Check the battery
- Rebuild the carburetor
- Clean the gas tank
- Check the spark plugs
- Electrical check
- Oil change
- Chain and sprockets
- Brakes
- Tires
- Motorcycle painting
Checking the bike’s battery is a great way to get started. It’s one of the easiest mechanical things you’ll be doing, and it’ll help give you the confidence you need for the rest of the rebuild.
To check your battery, you’ll want to refer to your service manual. Looking at the service manual, find out what the voltage should be for your motorcycle’s battery. Next, give the battery a charge.
If you’re restoring a vintage bike, your battery may be completely dead. When the battery’s dead, refer to the service manual to find out how to replace it.
Check the Carburetor
Does your bike use a carburetor for its fuel delivery system? It’s easy for carburetors to become clogged up from old gas. While you let the battery charge, you can slowly begin the rebuild process for your carburetor.
If you’re lucky, you’ll be able to get away with cleaning the carburetor. However, it’s more likely that you’ll wind up having to do a complete carburetor rebuild. How can you tell if you need a simple clean or complete rebuild?
Once the battery’s done charging, fire up your motorcycle. Does the bike run, but sounds a little bit funny? If it just sounds a little funny, you got lucky, and all you’ll need to do is clean the carburetor.
To properly clean your carburetor, you’ll need to buy carb cleaner. You’ll be happy to know that there are plenty of inexpensive carb cleaners out there, and they’ll work just fine. After buying the cleaner, you’ll want to remove all of the rubber parts off of your carburetor.
The carb cleaner is too strong for rubber. If you leave the rubber parts on the cleaner will eat them up.
After removing the rubber pieces, you can begin applying the cleaner. Go slowly and pay close attention to make sure the spray only touches the carburetor.
When You Need a Full Carb Rebuild
Let’s say you charged the battery, fired up the bike, and it sounds more than just a little funny. When you’re hearing strange sounds, or your bike won’t start, you probably need to fully rebuild your carburetor.
To make sure a full rebuild is what you need, start by pulling the carbs out. Take a closer look at the gaskets and all of the jets. Do the gaskets look like they’re so brittle they could break at any moment? Can you tell the jets have seen a lot of action in their day? Since you already have the carbs out, now’s the perfect time to do a full carburetor rebuild.
To properly rebuild your carburetor, you’ll need to purchase a rebuild kit. The kit will come with new factory jets and gaskets. Once again, you’ll need to refer to your trusty service manual to guide you through the process.
Enjoy Your Ride
Now you know the best steps to take for fixing up an old motorcycle. Whatever type of bike you have, you’ll be sure to love the way it feels once you get it out on the road. We hope our article will inspire you to take your time, as you slowly and properly restore your bike. For more guides like this, check out the rest of this site.

